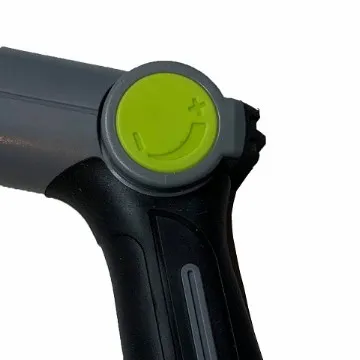
Hey there, fellow garden enthusiasts! I'm a supplier of water hose nozzles, and I know how frustrating it can be when your trusty nozzle decides to break down. But don't worry, because in this blog post, I'm gonna walk you through the steps to repair a broken water hose nozzle. Whether it's a Garden Hose Twist Nozzle, an Adjustable Garden Hose Nozzle, or an 8 Pattern Plastic Garden Hose Spray Nozzles, I've got you covered.
Step 1: Assess the Damage
The first thing you need to do is take a good look at your broken nozzle and figure out what's wrong with it. Is the nozzle cracked, the handle broken, or is it just not spraying water properly? Sometimes, the problem might be as simple as a clogged nozzle, which can be easily fixed. Other times, you might need to replace a part or two.
If the nozzle is cracked, you can usually tell by looking for visible breaks or splits in the plastic. If the handle is broken, it might be loose or not moving properly. And if the nozzle isn't spraying water correctly, it could be due to a blockage in the spray holes or a problem with the internal components.
Step 2: Gather Your Tools
Once you've assessed the damage, it's time to gather the tools you'll need to make the repair. Here's a list of some common tools that might come in handy:
- Screwdriver: You'll need a screwdriver to remove any screws holding the nozzle together. Make sure you have the right size and type of screwdriver for the job.
- Pliers: Pliers can be useful for gripping and turning small parts, especially if they're hard to reach.
- Replacement Parts: If you need to replace a part, make sure you have the right replacement on hand. You can usually find replacement parts at your local hardware store or online.
- Cleaning Supplies: If the nozzle is clogged, you'll need some cleaning supplies to remove the blockage. This could include a small brush, vinegar, and water.
Step 3: Disassemble the Nozzle
Now that you have your tools ready, it's time to disassemble the nozzle. Start by removing any screws or clips holding the nozzle together. Be careful not to lose any small parts, as they can be difficult to find once they're on the ground.
Once you've removed the screws or clips, gently separate the different parts of the nozzle. You might need to use your pliers to help pry them apart if they're stuck. Take a close look at each part and see if you can identify the problem.
Step 4: Clean the Nozzle
If the nozzle is clogged, this is the time to clean it. Fill a small bowl with a mixture of vinegar and water (about 50/50). Soak the nozzle parts in the vinegar solution for about 30 minutes to an hour. The vinegar will help dissolve any mineral deposits or debris that might be causing the blockage.
After soaking, use a small brush to scrub the spray holes and other parts of the nozzle. Make sure to get rid of any dirt or grime that you can see. Rinse the parts thoroughly with clean water and let them dry completely before reassembling the nozzle.
Step 5: Replace the Broken Parts
If you've identified a broken part, it's time to replace it. Take the broken part with you to the hardware store or look for a replacement online. Make sure you get the exact same part or one that is compatible with your nozzle.
Once you have the replacement part, simply remove the broken part and install the new one. Follow the reverse order of disassembly to put the nozzle back together. Make sure all the parts are properly aligned and tightened.
Step 6: Reassemble the Nozzle
After cleaning or replacing the parts, it's time to reassemble the nozzle. Start by putting the internal components back in place, making sure they're properly seated. Then, attach the different parts of the nozzle together and secure them with the screws or clips you removed earlier.
Tighten the screws or clips firmly, but be careful not to overtighten them, as this could damage the plastic. Once the nozzle is reassembled, give it a test run to make sure it's working properly.
Step 7: Test the Nozzle
Now that you've reassembled the nozzle, it's time to test it. Attach the nozzle to your garden hose and turn on the water. Check to see if the nozzle is spraying water correctly and if the handle is working smoothly.
If the nozzle is still not working properly, go back and double-check your repair. Make sure all the parts are installed correctly and that there are no loose connections. You might also need to repeat the cleaning process if the blockage wasn't completely removed.
Tips for Preventing Future Damage
Once you've repaired your nozzle, you'll want to take steps to prevent it from breaking again. Here are some tips to help you keep your nozzle in good working condition:
- Store the Nozzle Properly: When you're not using the nozzle, store it in a dry place. Avoid leaving it outside in the sun or rain, as this can cause the plastic to crack or fade over time.
- Use the Nozzle Correctly: Make sure you're using the nozzle according to the manufacturer's instructions. Don't apply too much pressure or force when using the handle, as this can cause it to break.
- Clean the Nozzle Regularly: To prevent clogs, clean the nozzle regularly. You can do this by soaking it in a vinegar solution every few months or as needed.
Conclusion
Repairing a broken water hose nozzle doesn't have to be a difficult or expensive task. By following these steps, you can usually fix the problem yourself and save money on a new nozzle. Whether you have a Garden Hose Twist Nozzle, an Adjustable Garden Hose Nozzle, or an 8 Pattern Plastic Garden Hose Spray Nozzles, you can get it back in working order in no time.
If you have any questions or need further assistance with your water hose nozzle, don't hesitate to reach out. As a water hose nozzle supplier, I'm here to help you find the right solutions for your gardening needs. Whether you're looking for a replacement part or a new nozzle altogether, I can provide you with high-quality products at competitive prices. Contact me to start a procurement discussion and let's get your garden watering system back on track!

References
- "How to Repair a Garden Hose Nozzle." Home Repair Tutor. Accessed [date].
- "Fixing a Broken Garden Hose Nozzle." Family Handyman. Accessed [date].


